Operations with Audio Tracks during Import of Media-Files
SL NEO platform contains a set of instruments that allow changing parameters of audio tracks during file import. The set of instruments is similar both for manual import of files in Air Manager and News Cut and for automatic import implemented through Transfer Manager.
The dialogue box “Transcode Options – Audio” allows configuring parameters for conversion of audio tracks.
| Parameter | Description |
|---|---|
| General | Setting basic parameters of a final track |
| Sample Rate | Sample rate: Auto or 48000 |
| Channels | The number of audio-channels in a track: Auto, 1, 2, 4, 6, 8. |
| Codec | Choosing a codec: Auto, Raw 16bit PCM, Raw 24bit PCM, Dolby AC-3, OGG Vorbis, ADPCM, MPEG1 Layer II, MPEG1 Layer III (available options depend on the selected Channels value) |
| Bitrate | Setting the speed value for a stream of compressed audio data: Auto, 64kbps-1536kbps with 32kbps interval (available options depend on the selected Codecs value). |
| Audio Normalization | Configuring Levels |
| Audio Processing | Applied audio processor:
|
| Level Mask | Choosing channels for the analysis of original levels. |
| Process Mask | Choosing channels to apply the processing result. When using the normalization function, mark the audio-channels to apply the procedure to. Selecting channels for normalization is necessary because there are situations, when one channel contains “useful” sound and the other one has silence (noise). Choosing both channels will normalize the audio level of a channel with noise to the normalization level. |
| Value | See above |
| Peak detection interval | See above the description of the Normalize option |
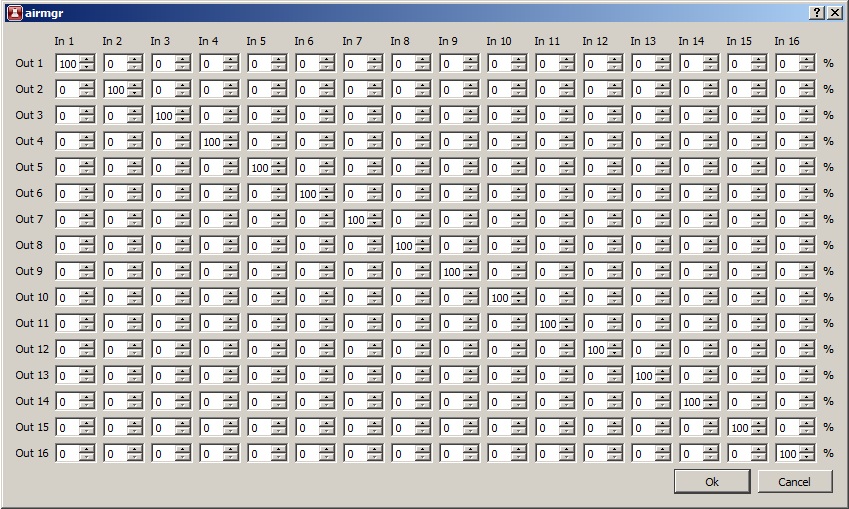
| Channel mixer | virtual switcher-mixer of audio-channels with 16х16 dimension |
| Source Track Layout | The instrument allows transcoding original audio-tracks and forming several output tracks (audio programs) from them.
|
Example #1 - AC3 Pass-Through
This operation allows simultaneous import of files and conversion of data batches of the original track Dolby Digital 2.0 (AC3) into PCM batches without decoding the AC3 track and with no changes to the original track. This is useful in case if you need to broadcast the original AC3 track as part of SDI + AES Audio Embedded from the server output.
To activate this mode during import, configure the Track Layout window. In the Track Number field, specify a total amount of audio programs in output audio — one. In the Src Track #1 field, define the sequence number of an original track that contains AC3 data, or choose Any.
Specify the number of audio channels in the original track (six) in the Src Channels field or choose Any. In the Src Codec field, define the codec type of original track - AC3. Activate AC3 bypass in the Dst Channels field.
After this operation, AC3 data batches will be converted to PCM data batches for broadcasting from the server output as a part of AES/Embedded audio during clip playout.
Note: the function doesn't work with original AVI-files; you will hear crackling while watching clips with AC3 pass-through track in the File Monitor window, because it doesn't have a mechanism for decoding AC3 data batches within PCM.
Example #2, Track 1: Decoding AC3 and Forming a Stereopair (PCM), Track 2: AC3 Pass-Through
Let's consider a variant of creating two independent audio programs from one original AC3 track. To create a stereopair, configure Track Layout window. In Track Number field, specify the number of programs (tracks) in output audio — 2. In Src Track #1 field, enter the sequence number of original track that contains AC3 data. Set the number of audio channels of original track (6) in Src Channels field, or choose Any. In Src Codec field choose a codec for the original track — AC3. Enter the number of output channels in Dst Channels field - 2. After these actions the AC3 track will be decoded and converted into a stereopair.
In Src Track #2 field, enter the sequence number of a track containing AC3 data and implement settings for conversion of AC3-Ac3 pass-through. No need to change the Auto values for output audio parameters in the General field. The Channels value will be automatically set as “4”, Codec will be set as RAW PCM by default.
AirManager is configured by default to display two audio channels. You can increase the number of channels in menu: AirManager→File→Configure→Preview→Sound Channels - the number of channels displayed while viewing materials in File Monitor window. Reload Air Manager after applying changes.
Buttons under the level indicator in the File Monitor window allow choosing channels for listening through via stereo audio output of a client station: L/R - switching a channel to the left/right output channel, respectively; A — switching a channel to both left and right channels; Ø — no switching.


