Table of Contents
Tips for Working with Godot Editor
Setting the Project Screen Size
In the project settings, specify the screen size corresponding to the used format, e.g. for HD:
Project→Project Settings→General→Display→Window→Viewport Width = 1920.Project→Project Settings→General→Display→Window→Viewport Height = 1080.
The setting will be used for all project scenes.
Measurement Units Used in Scenes
In 2D scenes, positions and sizes are specified in pixels. In 3D scenes, positions and sizes are specified in meters. Easily position the 3D scene in 2D space by using preview mode and camera positioning.

Choosing the Scene Type
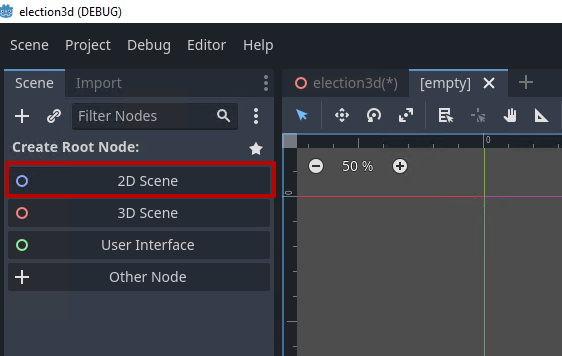
Godot Engine allows creating projects with two types of scenes: 2D and 3D. Press “+” to create a new scene.

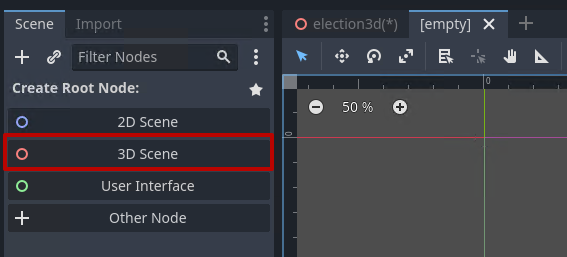
After adding a new scene, select its type:
- 2D Scene. This option will create a root “Node2D”. Use this option as the main scene if you want to create a scene with 2D effects, a background scene for a 3D scene, or a scene displayed on an object in a 3D scene.

- 3D Scene. This option will create a root “Node3D”. Use this option as the main scene if you want to create a 3D scene: e.g., a virtual studio or a scene with augmented reality objects.

Simultaneous Using of 2D and 3D Scenes
If needed, you can combine 2D and 3D scenes in your projects. To include one scene (scene B) into another one (scene A), do the following:
- Add the SubViewport node to the scene A tree.
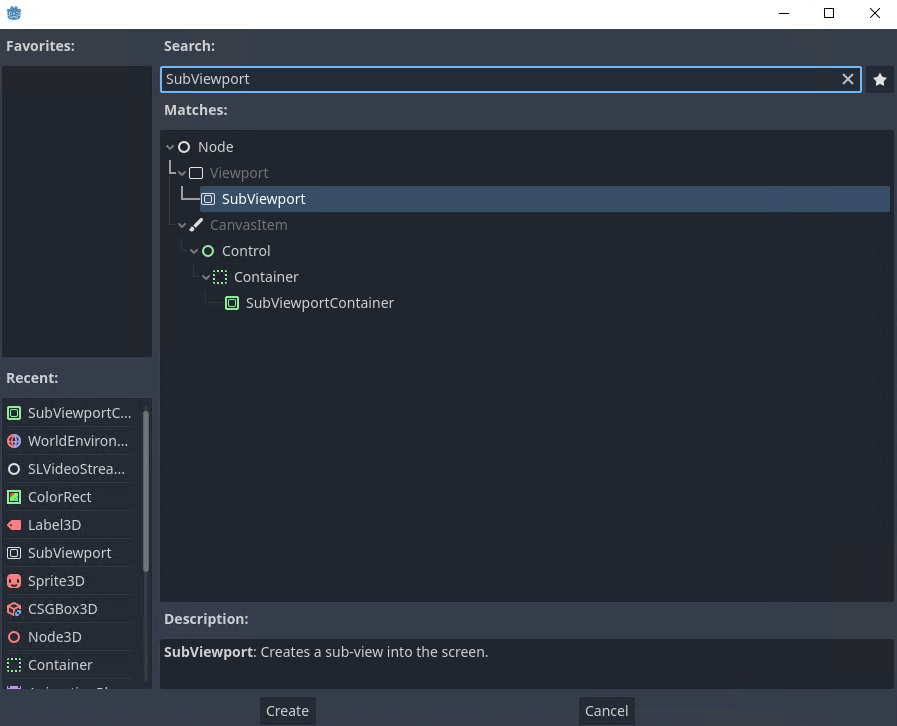

- Drag and drop the tscn file of scene B to SubViewport.

- Create a Sprite2D or Sprite3D object, depending on the scene A type.
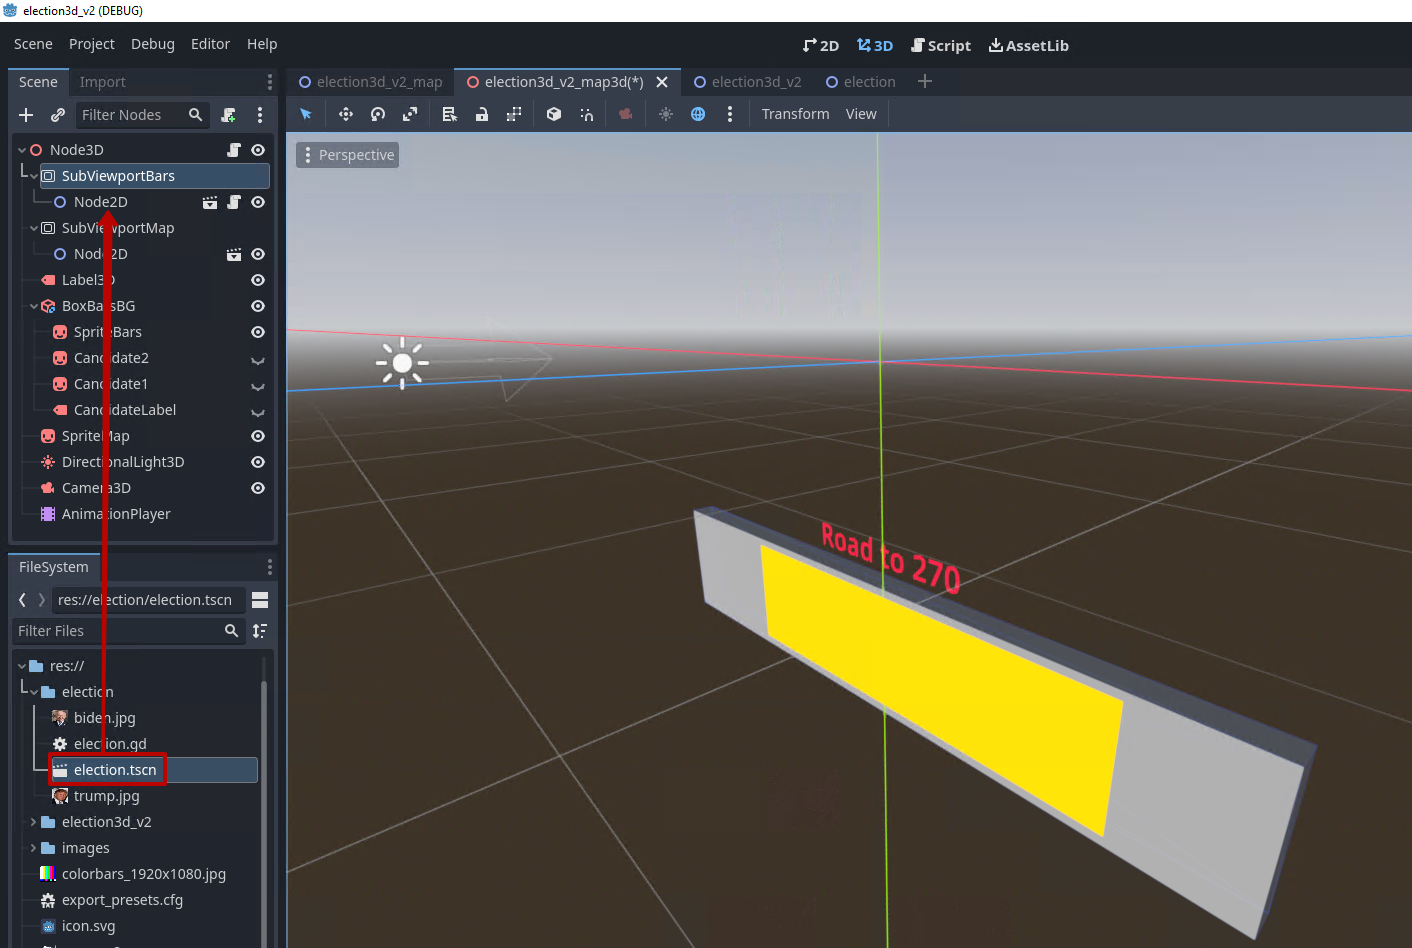
- In the scene A script, write the code:
func _process(delta):
        var texture = $SubViewportBars.get_texture()
        $BoxBarsBG/SpriteBars.texture = texture
This code will overlay the render of scene B as a texture on the sprite node in scene A.\


The image shows the result of rendering a 3D scene with a nested 2D scene.

Anti-Aliasing
Anti-aliasing is a technique used in image processing to make the edges of curved lines smoother. Godot supports several technologies suitable for different types of scenes.

Detailed information is available on the official documentation pages for 2D Anti-Aliasing and 3D Anti-Aliasing.
Read more about general principles of the algorithms in the article How 3D Game Rendering Works: Anti-Aliasing
MSAA
MSAA or Multisample anti-aliasing is the algorithm similar to SSAA, but working only when actually needed. The algorithm saves resources by averaging the color of outer pixels instead of the entire scene.
Features:
- Classic method.
- Efficient on the object edges.
- Does not introduce blurriness.
- Three quality levels available: 2х, 4х, 8х.
- Level 8x requires too much resources.
Configuring:
- for 2D:
Project→Project Settings→General→Rendering→Anti Aliasing→MSAA 2D. - for 3D:
Project→Project Settings→General→Rendering→Anti Aliasing→MSAA 3D.
TAA
TAA or Temporal anti-aliasing is combining the results of previously processed frames into one high-quality frame. The anti-aliasing algorithm takes pixel information not only from the current frame but also from the previous one. This allows TAA to avoid the flickering effect, for instance, on thin objects.
Features:
- Actively used in modern solutions.
- Introduces a slight blur when working.
- A halo may remain upon active movement.
3D setting: Project→Project Settings→General→Rendering→Anti Aliasing→Use TAA.
FXAA
FXAA or Fast approximate anti-aliasing) is the process of search for dramatic color changes in the image and smoothing of problem areas. The algorithm smooths only the problematic part of the image, not the entire object.
Features:
- Works faster than any other anti-aliasing method.
- Supports anti-aliasing transparency.
- Works poorly with mirror overlay.
- Gradually being replaced by TAA.
- FXAA introduces moderate blurring when enabled (more than TAA, when the cam is still, but less than TAA when the cam is moving).
- Small distant objects are blurred more.
SSAA
SSAA or Supersample anti-aliasing is happening while creating the scene.
The work principle is to take a high-resolution image and compress it to fit the screen size.
Features:
- Provides the highest possible quality of anti-aliasing.
- The most demanding method.
- Simultaneous anti-aliasing of edges, transparency, and mirror overlay, without creating potential halo artifacts.
Available in advanced settings: Project→Project Settings→General→Rendering→Scaling 3D
Anti-Aliasing in SubViewport
The anti-aliasing parameters set in the project settings do not apply to scenes rendered through the SubViewport node.
After selecting the SubViewport node in the scene tree, you can configure the anti-aliasing settings in the inspector window.

Path to User Directory
The GDScript code allows console output of the current path to the project’s working directory, with files available in GDScript via user://<filename>:
print(OS.get_user_data_dir())
In Windows, this data is usually located in the directory: %APPDATA%\Godot\app_userdata\<Project_Name>, where <Project_Name>:
- When running from Godot Editor - this is your project’s name specified in the settings:
Godot Engine→Project→Project Settings→General→Application→Config→Name. - When running from Godot Editor - this is Godot Engine module name specified in the control console settings:
Neovid→Administrator Control Panel→Manage→Godot Engines→Name.
Reading Data from File
The GDScript code allows reading data from a text file:
func load_votes():
        var votes = []

        var votes_path = "user://votes.txt"

        if FileAccess.file_exists(votes_path):
                print("file found")
                var file = FileAccess.open(votes_path, FileAccess.READ)

                while not file.eof_reached(): #try all lines until the file end is reached
                        votes.append(file.get_line())
                file.close()

        else:
                print("file not found")
Using Timer
The Timer node may be used for performing certain actions in a loop with a certain interval or once with a certain delay.

Select the Timer node in the scene tree and specify the parameters.

| Parameter | Description |
|---|
| Wait Time | Waiting time before signaling. |
| One Shot | Setting the single shot mode. |
| Autostart | Launches the timer when the scene starts. |
Set the timer receiver.

The _on_timer_timeout() function will be called when the timer is triggered.
Describe the function to be called in GDScript:
func _on_timer_timeout():
        pass
Timer can be launched from GDScript, for example, when the scene starts:
func _ready():
        $Timer.start()
Keyboard Scene Control
The Godot scene view window allows sending control commands to the scene via the keyboard.
Open the project setting window: Project→Project Settings→Input Map. Enter the name of the action to be associated with the keyboard button or key combination in the Add New Action box and click Add.

Use the + button next to the added action to associate with the key combination.

In the opened window, press any key or key combination. The pressed combination will be displayed at the top of the window. Press OK to confirm. You can associate several combinations with one action, repeating the previous operation.
Use GDScript to assign the needed functionality to configured actions.
func _input(event):
        if event is InputEventKey:
                print(event) #debug console output of all user input in the Godot window

        if event.is_action_pressed("cam1"):
                print("cam1 pressed")
        if event.is_action_pressed("cam2"):
                print("cam2 pressed")
        if event.is_action_pressed("cam3"):
                pass
Action settings are saved in the [input] section of the project.godot file and will work great in the Godot Editor.

To keep using keyboard shortcuts while running a scene in the Godot Engine module, you'll need to move the contents of the [input] section to godot.add manually. The godot.add file is located in the directory specified by the Neovid→Administrator Control Panel→Manage→Godot Engines→Godot_N→Project path setting.
Sound Control in SLVideoStreamPlayer Node
The parameter animation allows controlling the audio from the source played in the SLVideoStreamPlayer window.
Configuring
Add the AnimationPlayer node to the scene tree.

Select the AnimationPlayer node, then select Animation.

Select Animation→New in the opened window. Specify a name for the created animation.

After adding an animation, you will see a timeline, control buttons, and animation settings.

| Element | Description |
|---|
| 1 | Buttons to start and control animation playback. |
| 2 | Cursor current position on the timeline |
| 3 | Selected animation |
| 4 | Button to auto-play animation when loading a scene |
| 5 | Animation duration |
| 6 | Cursor |
| 7 | Button to add a new track to the timeline |
Press Add Track→Property Track to add a new parameter animation track.
In the opened window, select the node whose parameters you plan to animate. In our case, it’s SLVideoStreamPlayer.

Then, select the parameter to be animated. In our case, it’s volume_db, responsible for the loudness level.

Right-click the needed timeline position and select Insert Key to add a keyframe.

Repeat for all points with the loudness value to be adjusted.
The check mark to the left of the parameter name on the timeline allows you to disable animation of this parameter temporarily.
A solid horizontal line between the points indicates that there is no change in the value of the target parameter in this interval.

Click on the second point and in the Inspector window change the parameter value to -80, muting the sound completely. In the Easing parameter, you can specify the function of the parameter change. By default, the value changes linearly: Easing=1.

The solid line has gotten slanted, indicating that the sound volume will decrease as the animation plays.

Now we have a FadeOut effect with a 5 seconds duration.
Other sound animation effects, as well as animations of other parameters, are implemented in the same way.
Launch
The created animation can be launched at any moment from GDScript, e.g. pressing a button:
func _input(event):
        if event.is_action_pressed("cam1"):
                $AnimationPlayer.play("map_animation") #the AnimationPlayer node receives the command to play map_animation
Preloading Scenes
In some cases, preloading the scene may be necessary to avoid possible freezing.
The code below performs the mandatory preloading of the specified scene.
var map_and_bars_scene= preload("res://election3d_map_and_bars/map_and_bars.tscn")
No Mask Rectangular Area Clipping
If you want to clip a rectangular area from an object, various techniques are available. For example, using the Control node:
- Add the Control node to the project tree.
- Set the needed size for the Control node (size of the clipped area).
- Enable the
Inspector→Control→Clip Contents = Onparameter for the Control mode. - Insert the clipped object into the Control node. The child node will be positioned from the top left edge of the Control node, so you will need to set the correct offsets.

The result of clipping an area in the video signal played by the SLVideoStreamPlayer node.
