Table of Contents
Setting Logo Management
SL NEO servers provide at least two options for logo management.
First Option: Loading Logo Files to Server via Control Web Console
Step 1. Uploading a logo file.
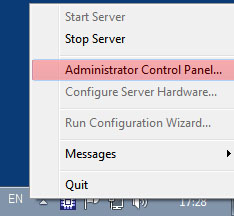 Loading is implemented from the Administrator Control Panel with functioning server software. Login to the console is implemented locally from the server or from any machine in the network by the address http://server_ip:7901. Login the control web console as an administrator.
After login, select the Files item in the left menu, then click Upload File and select a logo file. The loading procedure is simple copying files with no conversions. Thus, the logo file must have fullscreen resolution with the previously positioned logo. 32-bit TGA, PNG, AVI, and MOV files are supported. When files are uploaded, they appear in the list on the control panel Files page.
Physical location of uploaded files is the server folder C:\Program Files\SL NEO Media Platform\run\files.
==== Step 2. Binding the logo file to a certain server playout channel.
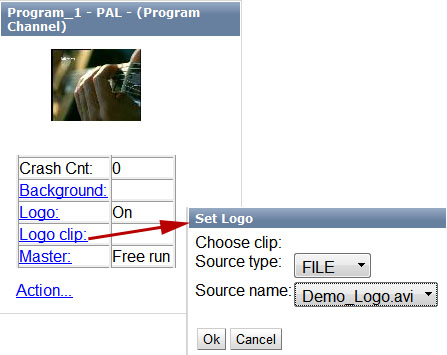
The procedure can be implemented from the control web console Status menu item. In the program channel window (Program_1 at the picture), select the Logo Clip menu item. Select the FILE Source type in the opened dialogue window. In the Source Name field select a logo file from the list of previously uploaded files. The Logo item of the program channel window (Program_1) allows you to turn on/off the logo manually and see the result at the corresponding server output.
Step 3. Setting control of turning on/off the logo from the playlist.
The procedure is implemented from the control web console: Manage menu item, Program Outputs tab. Open the Actions tab in the selected playout channel, find the Playlist events item and click Add Action. In the opened window, enter the parameters of a rule for logo management from a playlist column.
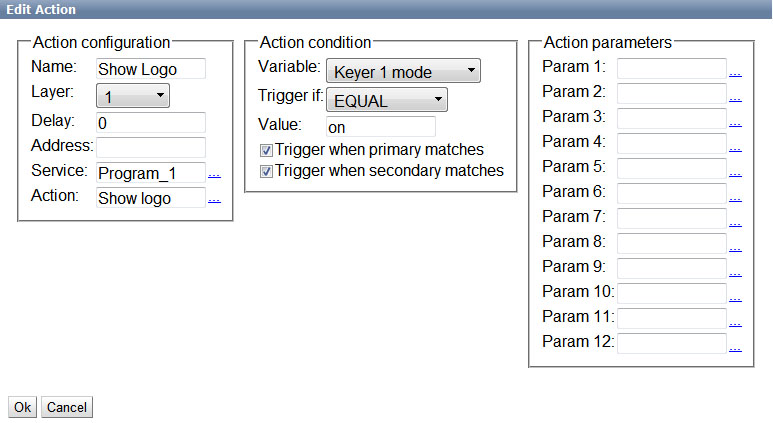
In the Action Configuration window, enter a random name for the rule into the Name field, set “1” in the Layer field. Specify the server IP address in the Address field or leave the field empty if the value is localhost. Select the service name by the button … in the Service field. In our example, it is the playback channel No. 1 (Program_1 on the list).
In the Action Condition window, find the Variable field and specify the playlist column responsible for turning on the logo. Set the trigger to EQUAL, enter “on” in the Value field.
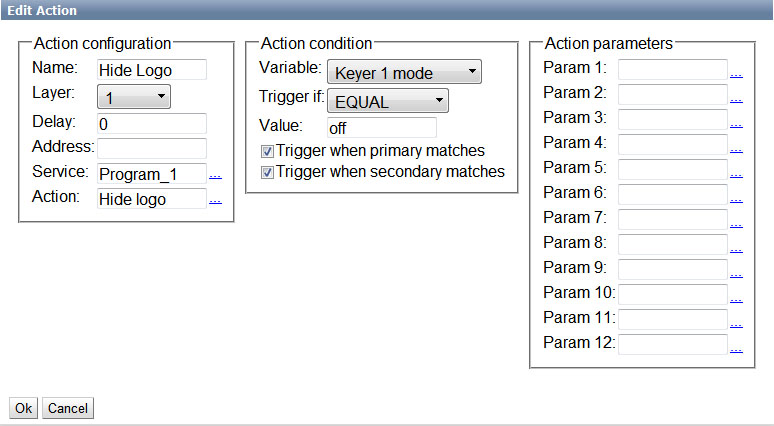
Use the same scheme for creating a rule to turn the logo off.
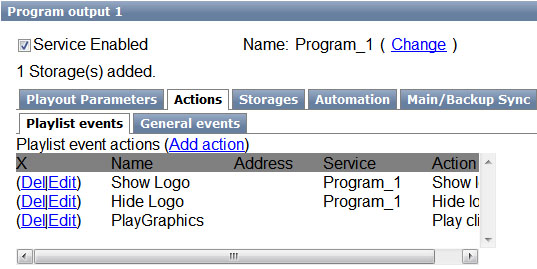
Now the Actions tab contains two new rules.
Click Apply Changes at the top of control console window. The configured playback channel will be reloaded, its playback will be stopped while reloading.
Now logo on/off management will be implemented from the Keyer1 playlist column.
Similar settings must be implemented for all other server playout channels that need logo management from the playlist.
When using non-compressed 32-bit files (avi, mov) as dynamic logos with the number of playout channels = 2…4 and more, the server may lack RAM, as all logo files are uploaded there.
The solution is preliminary file compression using the built-in 32-bit codec of the SL NEO platform. This may be implemented by the import of Air Manager files and specifying a file folder as the source and the receiver. The imported file will have bitrate sufficient for displaying logo in high quality, and about eight times less size, which excludes RAM problems.
Second Option: Using Graphic Compositions as Logos
Graphic compositions may contain clocks, weather reports and other elements. Managing playback of compositions is implemented from the lists of secondary events of the main playlist. Details...

