Configuring automatic recording according to internal server schedule
Recording management in SL NEO servers can be performed in any of 3 modes:
- Manual control.
- Automatic recording of materials according to a predetermined, detailed schedule - rec-list.
- Automatic recording according to the internal schedule of the server.
Let's dwell on the third mode. As a rule, the internal schedule is used when recording programs being formed, or when recording on air, in the so-called “loggers”.
The SL NEO server internal schedule implies setting up to 5 recording rules/intervals by days and hours/minutes, for example, “Monday-Friday from 8:00 to 15:00 and from 19:00 to 24:00”, “Saturday-Sunday around the clock”.
The procedure of setting internal recording schedules of SL NEO servers is performed from the Administrator Control Panel when the server software is running. Logging into the console is done locally from the server, or from any machine in the network at http://ip_address:7901. You should log into the management console as an administrator.
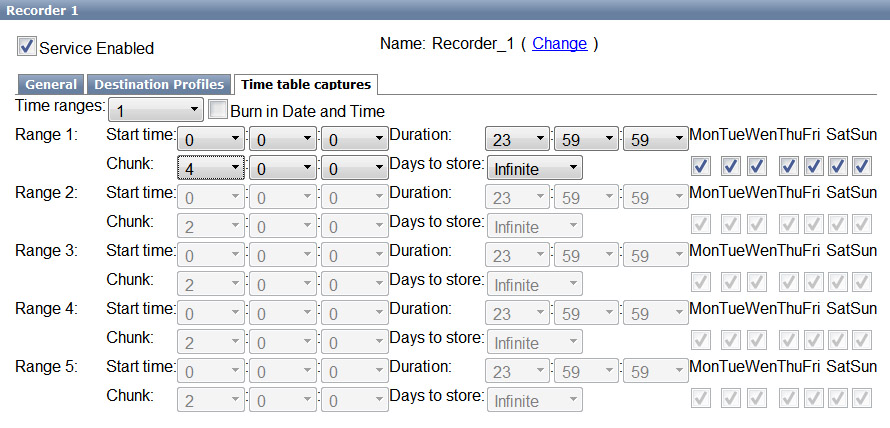
After logging into the management console, select Manage in the left menu, then select the Recorders tab. You can configure an individual recording schedule for each recording channel of the SL NEO server. To configure the schedule for channel 1 in the Recorder 1 window, select the Time table captures tab. Example of setting up 24 hour recording
. After you finish editing the settings, click the “Apply Changes” button at the top of the control console window. In this case, the corresponding recording channel will be reloaded.
.
The recording server service will then automatically generate a record list for the channel you want to start recording from.
Example Schedule Settings
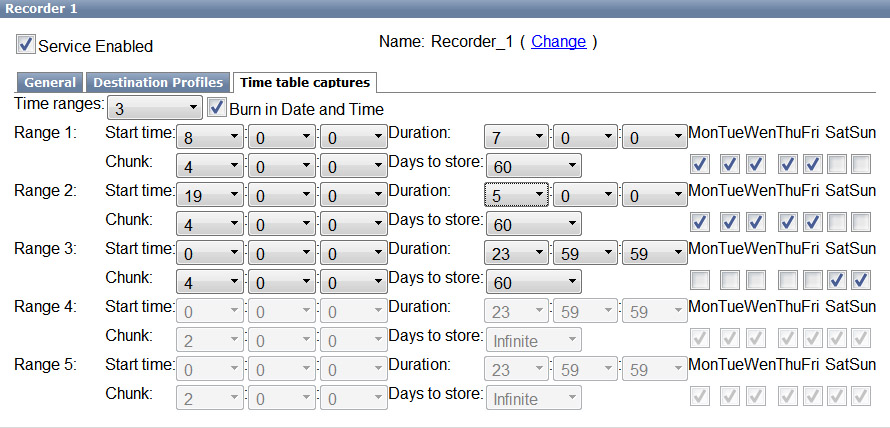
For example we will set up the following recording schedule: Mon-Fri from 8:00 to 15:00 and from 19:00 to 24:00, Saturday-Saturday around the clock.
In the Time ranges field, select the number of simultaneous rules/intervals on which the recording will be performed. For this example, we select a value of 3. After selecting, the parameters of intervals Range 1, 2, 3 become available for editing.
Set the start time and the corresponding Duration values for each interval of the recording, also mark the days of the week on which the recording will be made.
Let's set the Chunk value to 4 hours. In the Days to store field we set the storage duration of the recorded material to 60 days.
When you finish editing, in the upper part of the control console window click “Apply Changes” to save the settings made. In doing so, the corresponding recording channel will be reloaded.


